Before you install path lights at your home, there are several elements to consider. Not only will you need to find proper fixtures, you’ll need to familiarize yourself with best practices for installation. Keep these details in mind and you can install path lights like a pro.
How to Install Low-Voltage Path Lights
Lay your cables out along your desired path, starting with the GFCI outlet. This is the source of power for all your landscape lights and you’ll need a cable that reaches to it. Don’t plug any of the lights in yet. Though you’ll start your path at the power outlet, you don’t want anything powered ON until later. Plot out where you want to install your lights and determine which lights belong on the same circuits. You may need multiple transformers to cover several parts of your home’s exterior. Sometimes it helps to plot these details out on paper before you step outside. If you have the right measurements beforehand, you’ll know exactly how much cable (and how many lights) to purchase.
Once you lay your cable out, you can make a small trench nearby. You may use a gardening trowel for this task because it will help preserve grass surfaces as you slice divots along a straight line. Most of these divots can be somewhat shallow, between 2 and 3 inches deep. This long, shallow trench will eventually be used to hide the cable from sight. Remember to make sure you’re not digging near other utilities as you make these cuts, and consider where you want to include post lights. Each fixture needs about 10 feet of space to function effectively and to avoid clutter on your lawn.
Position your accent lights and in-ground well lights next. These may use the same cable as your path lights, so they can turn on and off with the same switch. Accent lights usually work best near architectural features, and in-ground well lights can add character as well. After all of your lights are in position, gently push the cables toward the base of the shallow trenches. Use firm, blunt edges for this part of the process. You don’t want to accidentally cut through one of these cables, so it’s usually best not to use the sharp edge of your gardening trowel.
Next, insert the posts to their specified depths. Check the product manual for your preferred style of path light to find out how deep they need to go. You can plug in the lights once you have these set up. Just remember to verify your setup before you cover the cables. If all of your lights turn on, you can bury the cables using the cuts you made earlier.
Additional Considerations for Path Lighting
There are several additional features you can use to improve your path lighting.
Timers
Timers automatically turn outdoor lights on and off at the same time every night. You can program these timers to function when you’re away on vacation as well.
Sensors
Security sensors provide another method for automation, and they’re especially useful with wall lights. In some cases, you may choose to wire a separate circuit for lights with motion sensors.
Covers
In addition to these power accessories, consider adding a protective cover to your outdoor power outlet if it doesn’t already have one. This prevents rain water and moisture from getting inside the outlet, and it can prolong the life of your wiring.
Cables
It’s also important to choose the right type of cable for your fixtures. The size of your wiring depends on the type of transformer you use and how far you plan to extend each circuit. Most fixtures and transformers indicate which type of cables to use during setup.
Time to Install
It doesn’t take long to install most path lighting. If you’re working with low-voltage fixtures and have an idea of where you want to install them, you can put these up in a single afternoon. However, there are some considerations that may slow this process. If you choose line-voltage fixtures or want to install more complex arrays of lights, your setup may take longer. It’s always a smart idea to contact a professional electrician if you have questions about your home’s wiring, and you’ll need their expertise if you plan to install line-voltage fixtures.
Which Types of Path Lights Do I Need?
There are several types of landscape lights available. These include common house lights such as the kind you install beside your door and those you’ll use to illuminate your path. Here are a few of the most common styles used to light paths and sidewalks.
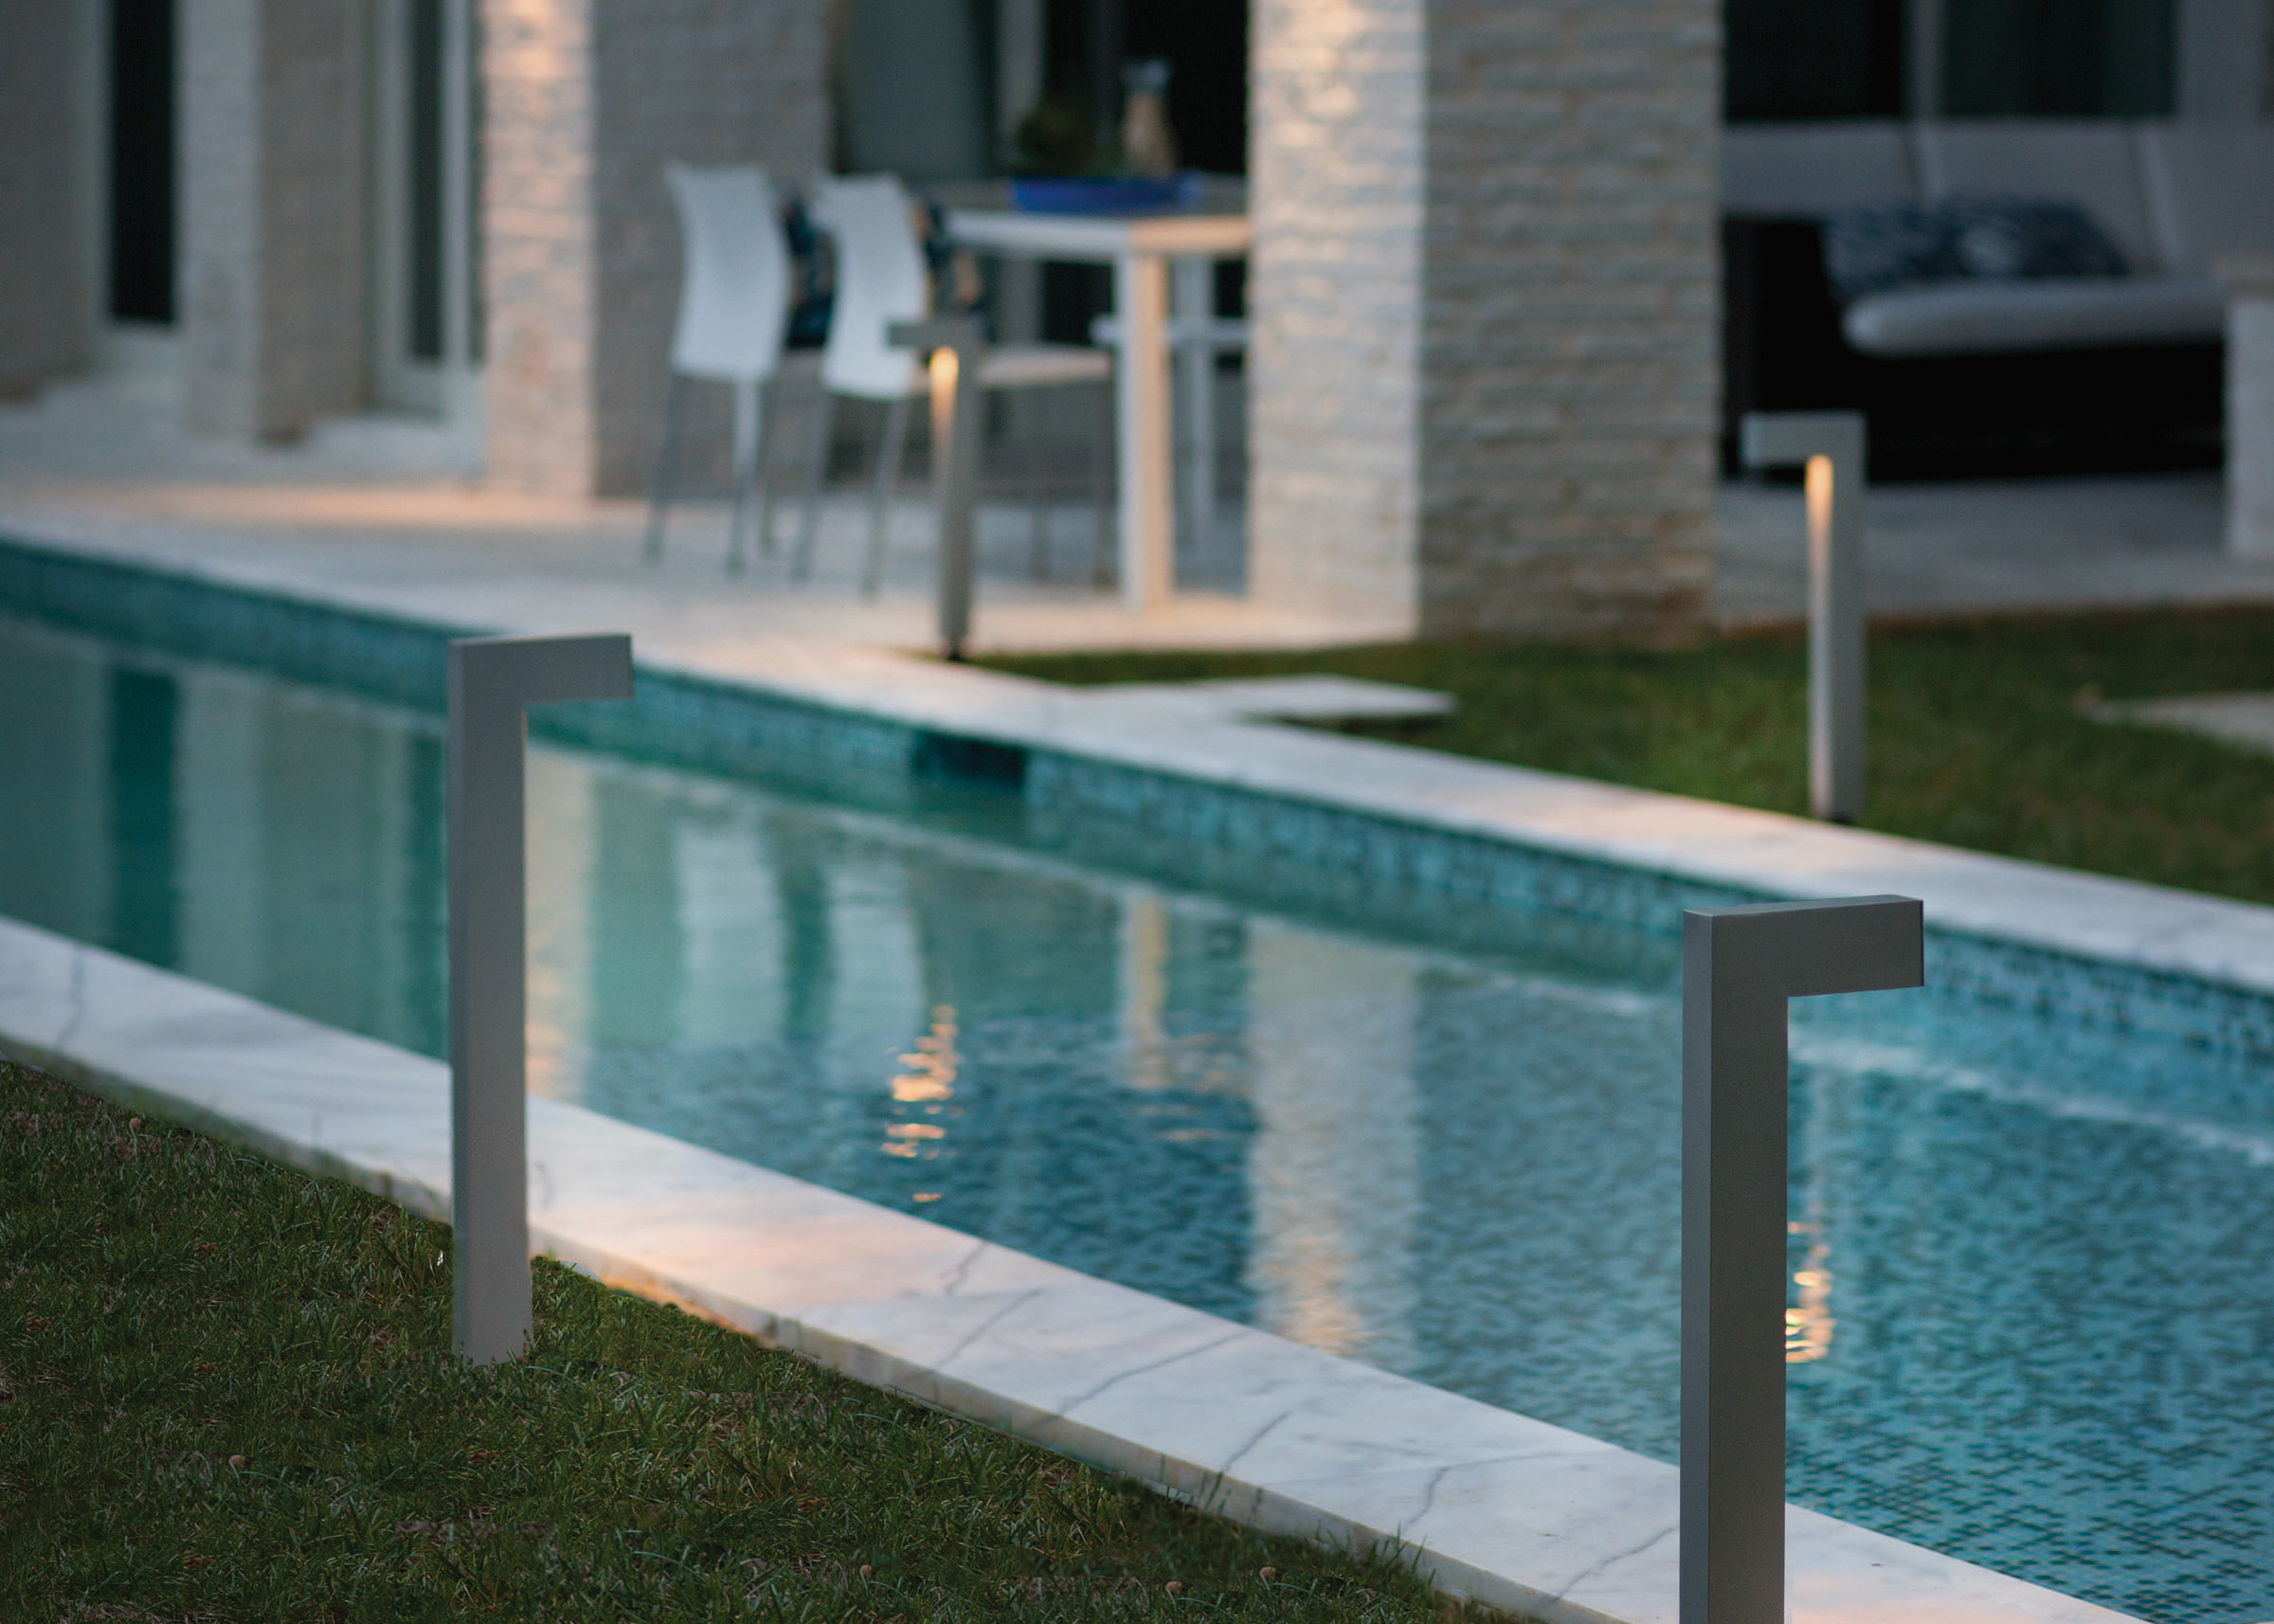
Path Lights – If you want to light your walkway or driveway, there are plenty of path lights to choose from. They’re made for use outdoors and rated for use in wet environments. Because these lights come in direct contact with the ground and because they’re always exposed to the weather, these lights need wet ratings for safe installation. Most path lights have hoods or diffusers that cast light toward the ground and eliminate glare for onlookers. These shades also give the posts distinct styles.

Choose your fixtures based on what you want to illuminate and based on how they look. If you want to cast light toward the ground without illuminating the surrounding area, you can use post lights with opaque hoods that block light everywhere except below. If you prefer to cast light on nearby plants and garden decor, you may prefer textured glass or patterned diffusers. Post-style path light serve as the backbone of your landscape lighting circuit. These fixtures can line the edges of your walkways, driveways and gardens. Because they’re such a vital part of most landscape lighting systems, there are many styles to choose from. Some path lights have simple, modern styles with LED bulbs and others have complex designs that include hanging lamps.
Accent Lights – Of course, outdoor lighting includes more than just path lights. If you want to highlight specific parts of your home’s exterior, you can use accent lights for targeted illumination. Accent lights, like all landscape lighting, need to be rated for wet environments if you want to use them outdoors. These are usually located in close proximity to the ground and lack protection from rain and snow, so damp-rated fixtures are often not sufficient. Use wet-rated accent lights to compliment the light provided by your path lights. They connect with the same circuit and cast directional light to highlight your home’s unique characteristics. Some of these lights hide in your garden, disguised as small statues that hide their purpose during daylight hours.
LED Lights – There are several reasons to consider LED landscape lighting to illuminate your path. LED bulbs usually run cooler than other types of bulbs, and they’re powerful. Most importantly, they’re less likely than other bulbs to attract bugs. Flying critters usually gravitate toward ultraviolet lights, and the best LED path lights tend to produce lower levels of UV light than traditional bulbs. Consider these bulbs in areas in and around your living space, especially if you want to reduce the chances of attracting airborne pests.
Wall Lights – Unlike many traditional landscape lighting fixtures, wall lights cover wide spaces with general illumination. These fixtures give you enough light to find your keys outside the front door, and they’re available in many different styles. Some wall lights have vintage and retro styles, which add character to the entryway of your home.
Security Lights – Security lights shine on areas when they sense movement. This works as a security feature, and it’s also a convenient way to illuminate external areas around your home. If you want to turn on the lights when you step onto your path, you can use security lights with motion sensors to automate the process. This can also help with energy conservation, as the lights turn off shortly after the motion ceases.
Helpful Tips for Path Light Installation
Once you know which lights you want to use, develop a plan on where you want to install them. This process requires a few simple steps. Before you start, consider the placement of underground utilities. You don’t want to dig near electrical lines. Your local city or county services department should be able to let you know where to look.
Outdoor lighting comes in two different voltages. Line voltage uses the same style of electricity as the lights in your home, and fixtures with this connection style require the help of an electrician for installation. If you use fixtures with line voltage, you can still plot out where you want to install your lights. Just choose their positions and work with your electrician for wiring. The other style of fixtures use low voltage for power. These require a transformer on your home’s GFCI outlet and you can complete the installation on your own. If you’re using low voltage path lights, here’s what you need to know.
When you consider the types of path lights you want to use, what you want to illuminate, and the locations where you want to place them, you’ll be able to install your outdoor lighting like a pro.
*Legal Notice: Destination Lighting content is for information only. It is strongly recommended that you consult a professional before attempting any lighting or wiring projects. The company is not liable for misuse of its content.