The pocket guide to recessed lighting
It’s a proven fact that everyone’s favorite part of school was recess. It was the one time during the day to get some fresh air, and rejuvenate your senses.
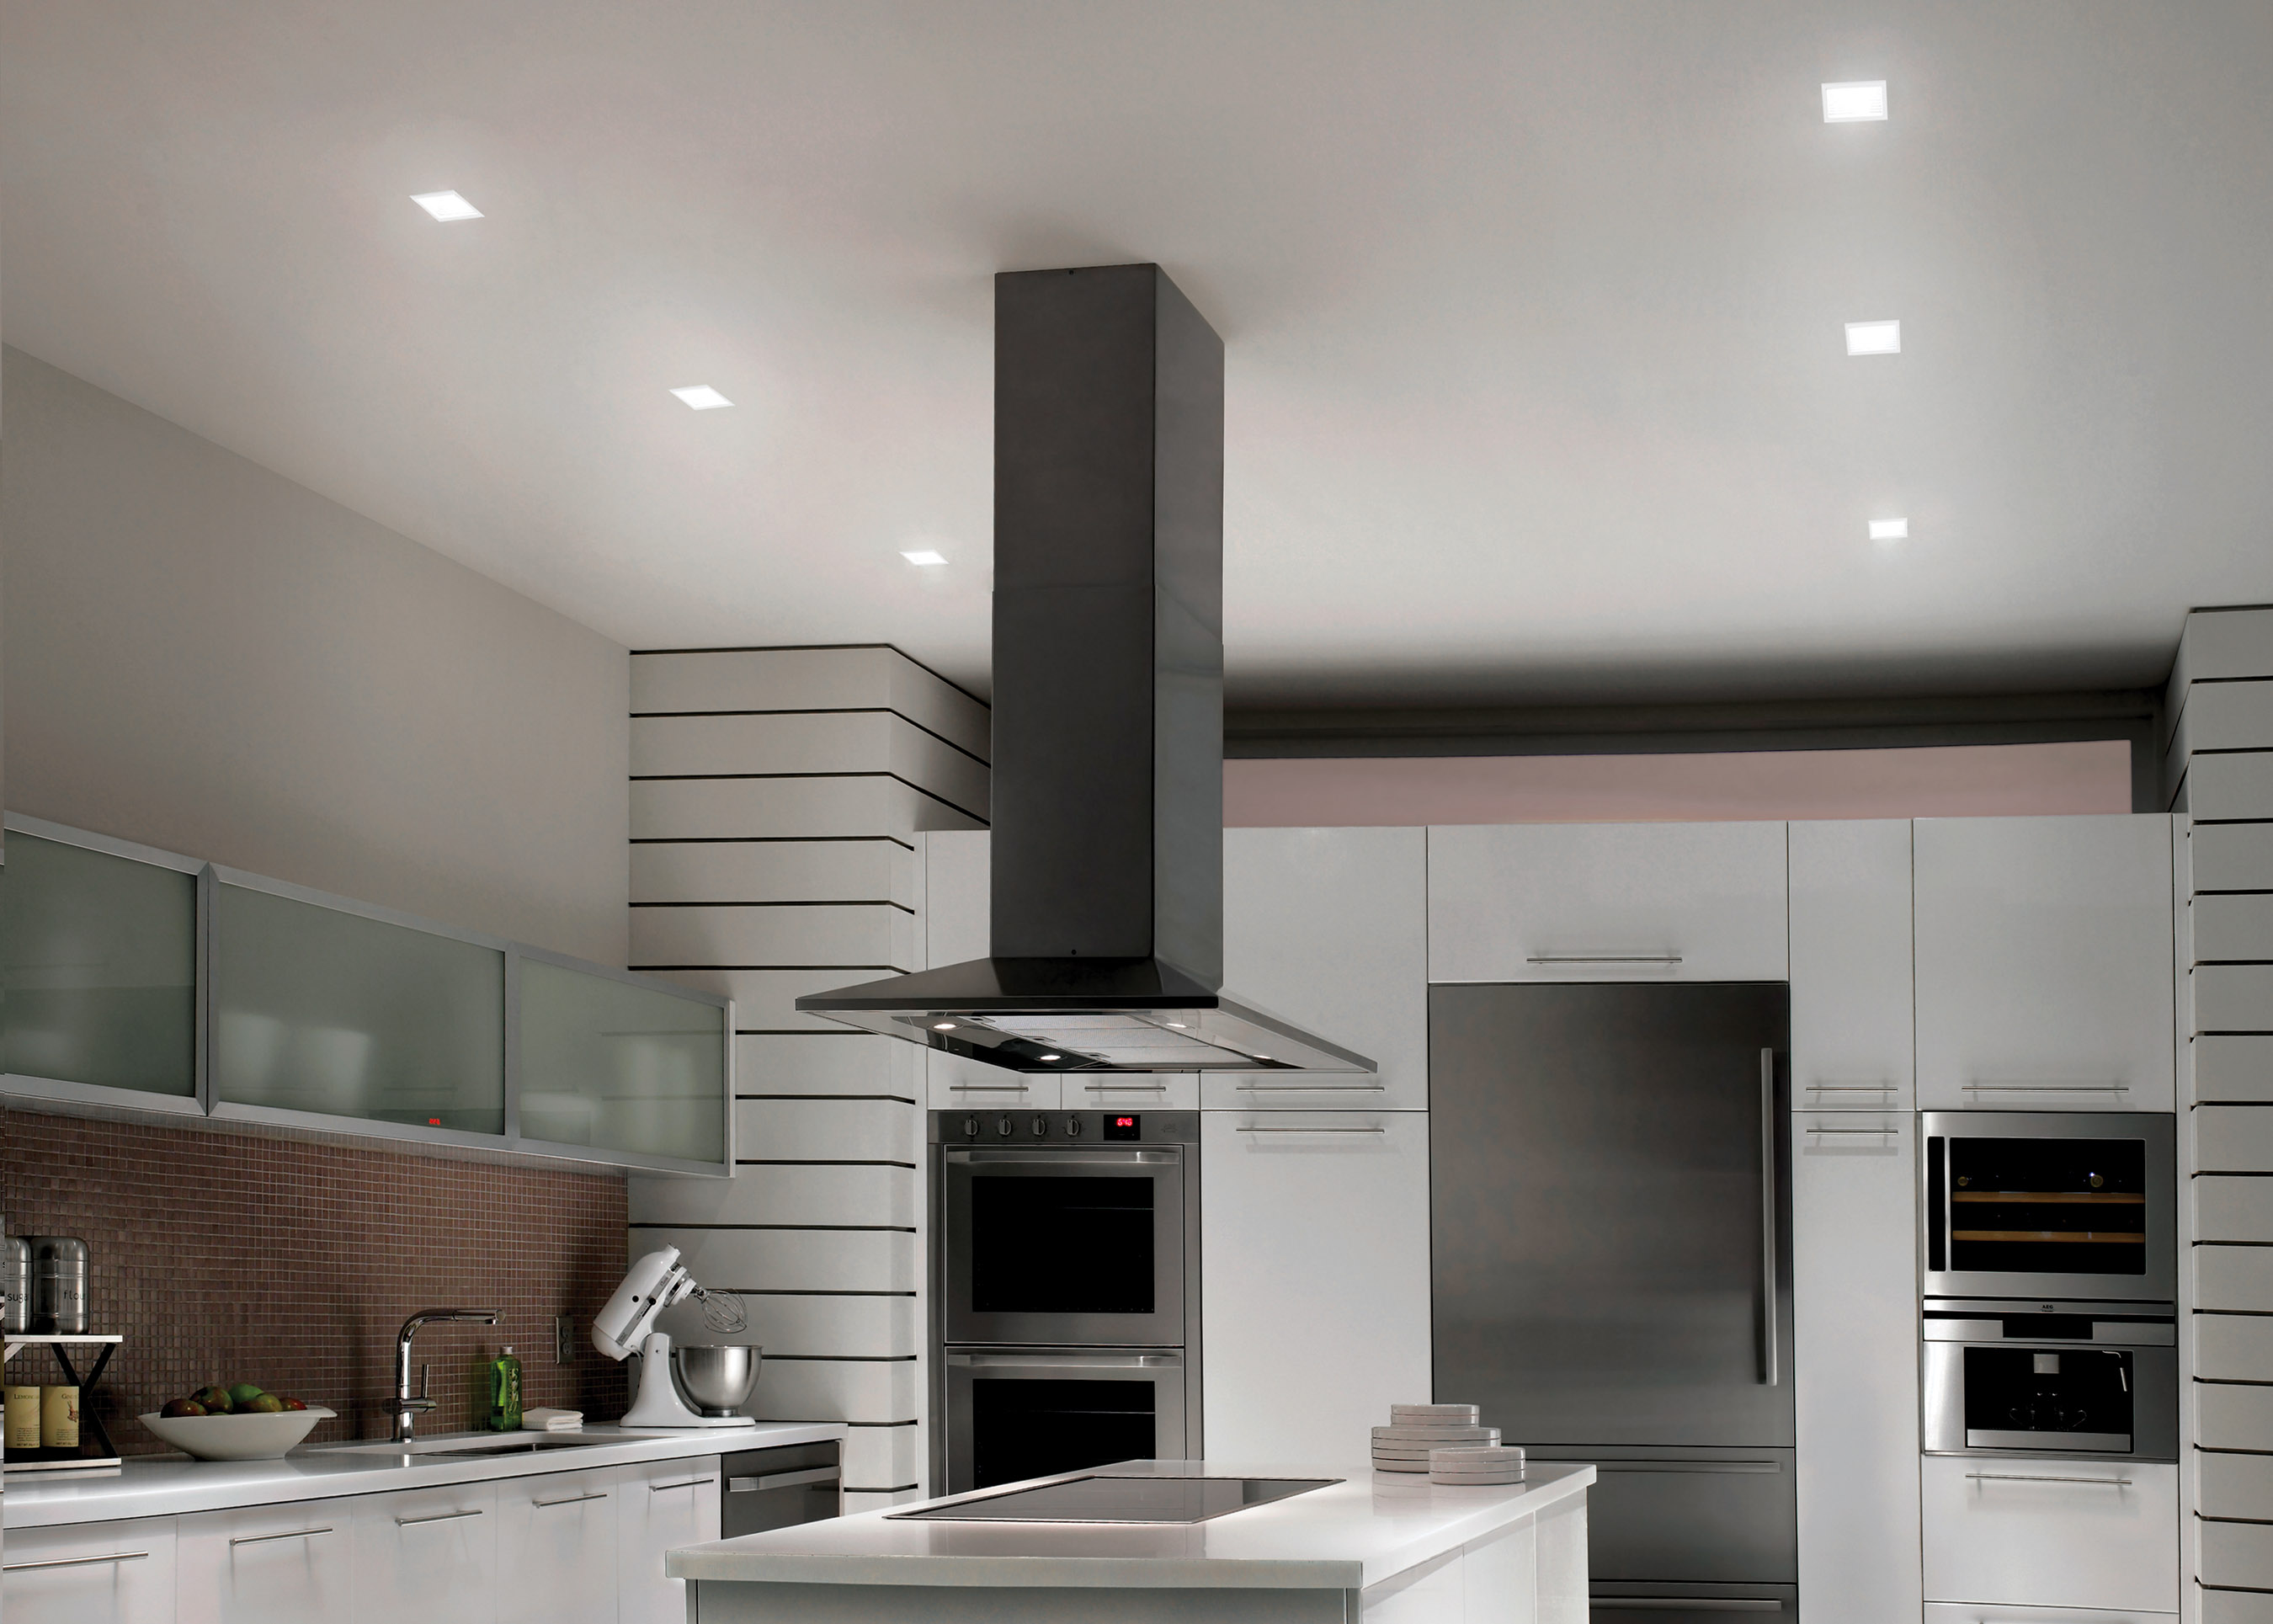
Well Recessed lighting is definitely the recess of light fixtures. It’s the light of choice for the uber minimalist, sacrificing material space for more white space. Recessed light fixtures provide a non-invasive, elegant way to brighten a bathroom, add illumination to a bedroom or provide task lighting for kitchen work surfaces. These fixtures can be installed for existing finished ceilings or as part of a larger, indoor/outdoor renovation project. You can start thinking about the plan for installing recessed lighting that meets your home design look and provide that aesthetic you’ve always wanted.
What is recessed lighting?
Recessed lights, or can lights as they’re sometimes referred, are lights that hang overhead from cut holes in your ceiling. They’re called recessed, because instead of hanging down from your ceiling like a standard pendant or chandelier, they’re actually inserted into your ceiling through an exterior trim and housing. They emit a beam type of lighting from above that gives your home a soft, almost angelic feel to your home.
But perhaps more than anything, they save space and remove and distraction from the design of your space for a very minimalist type of style.
If that sounds like your type of light fixture, keep reading on.
Here’s our step by step overview of everything you should know before you start
- Map it out – Visualize it and put the plan into motion.
- On your marks – Make the marks to get your home ready to go.
- The right fixture for your needs – Determine the types of recessed lighting you’ll need to use based on the installation space and conditions
- Nail your look- Equipped with the knowledge to make an informed decision, pick styles and functionality to your plan to light
Map it out
You might have the idea in your head, but now it’s time to make those thoughts concrete. Create a map of the area you want to light, noting important dimensional features of existing light fixtures and natural light sources such as windows or skylights.
Pro Tip: Be sure you note ceiling heights in each area. Ceilings higher than 10 feet may require a brighter light so it can spread evenly throughout your home.
Consider high traffic areas such as entryways, stairs and other places that may need brighter illumination. Consider how natural light changes throughout the day.
On your marks
Since you’ll be looking at existing wiring, be sure you turn off the power to all nearby circuits at the main panel before you begin your survey.
You should also note the position and direction of ceiling joists and the type of housing. Joists may alter the position of your recessed lighting. Insulation affects the kind of fixtures you choose. Be sure to look for obstacles such as air ducts, plumbing pipes or gas lines that may limit your installation area and record these on your map. You’ll also want to mark outdoor locations, showers and other areas that may get wet, as they’ll need specialized fixtures. Finally, note the position of existing light switches and the outlets, lights and wiring they control.
With an accurate understanding of your goals, your existing lighting and the physical characteristics of your space in hand, it’s time to lay out your new light fixtures. Start with areas that need ambient light and place recessed fixtures evenly to cover the space.
-
Total Coverage and Spacing
- The distance between the light and the surface determines the space between fixtures. A good rule of thumb is to divide the distance between ceiling and surface by two to give you the maximum distance between fixtures. For example, lights in an eight-foot ceiling should be spaced about four feet apart. Remember, most recessed lighting illuminates a circular area, so you should measure distances between all adjacent lights to ensure even coverage.
-
Task and Accent Lighting
- Once you’ve laid out lighting for seating areas and walkways, arrange task lighting fixtures to cover work surfaces or other areas in need of brighter illumination and place accent lights to highlight artwork or brighten a nook or bookshelf.
-
Time to Make Your Mark
- One way to visualize your fixture layout is to mark each light’s position with a piece of paint-safe masking tape. This method may highlight needs you missed in your initial plan, and makes it easy to take measurements. After you’ve finalized your fixture placements, note the in-ceiling space available at each location, as well as any special requirements such as insulation or moisture exposure.
The right fixture for your needs
Most recessed lights consist of three parts:
- The housing, or can, provides the electrical connections and holds the trim and bulb. There are two options: remodel and new construction.
- The trim is the decorative and functional face of the light and includes features such as lenses, eyeballs or light covers.
- The bulb, which must be compatible with the housing and trim and should have a beam spread that meets your lighting needs.
Remodel or New Construction Fixtures?
There are two types of recessed light housings on the market. Remodel fixtures can be installed directly below the ceiling and are the best choice if you don’t have access to an attic overhead. New construction fixtures, which aren’t limited to new building projects, are usually larger and require greater access to the installation area. You should only choose these products if you have access to an attic above your ceiling.
Going Low Profile in Tight Spaces
Depending on your home’s construction, the space available for recessed lighting can be very limited. Low-profile fixtures fit into narrow ceiling gaps, making it easy to place lights where they’re needed. These products are typically 5to 6 inches high, so they fit in almost any ceiling gap.
Insulation Ratings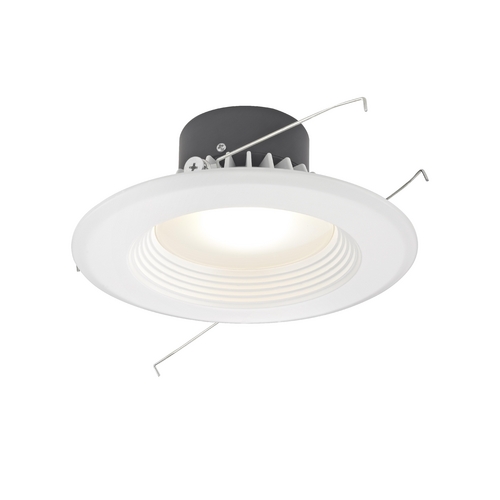
If your ceiling has insulation, you must choose fixtures rated for insulation contact. These products handle the heat produced by light bulbs when surrounded by insulating materials, significantly reducing the risk of overheating.
Airtight Fixtures
Some recessed lights have seals that prevent airflow between the ceiling or attic and living spaces. Using them creates a draft-free environment and reduces overall energy costs. Look for this feature if you’re installing lights between an insulated and bare area of your home or anywhere you want to eliminate stray air currents.
Retrofit Existing Fixtures
If your home already has recessed lighting installed and you’d like to upgrade them to accept LED bulbs, you can quickly and easily add retrofit modules.
Nail your look
Now that you have some of the basics down, it’s time for the fun part. Get creative by choosing a lighting trim that visually appeals to you and your future guests. Start with the size and shape of the recessed can, and then consider the type of illumination called for in your plan.
- Baffle trims offer an unobtrusive finished appearance and minimize glare, making them an excellent choice for places where you need ambient lighting.
- Reflector or specular trims have highly reflective interiors that maximize light output and reduce glare. They provide bright illumination for work surfaces and rooms with high ceilings.
- Adjustable, pivoting and wall wash trims let you focus light on specific locations, making them an attractive choice for accent lighting or highlighting artwork.
- Damp- or wet-rated trims protect bulbs from moisture for areas such as showers and outdoor spaces.
While many recessed lights have an understated look, some come with decorative shades you can use to add color and form as well as light to your home. Trims with chrome, brushed steel or other metallic finishes make it easy to match your new lights to the bathroom or kitchen hardware you noted in your lighting plan.
Good to Know: Wattage, Bulbs and Lumens
You should consider a recessed lights’ wattage rating and the type of bulb it uses when making your lighting selection.
- Wattage indicates the maximum power rating of the bulb you can use in the fixture.
- Bulb type determines its lighting characteristics and efficiency.
- Lumens indicate the actual light level they produce.
Halogen and in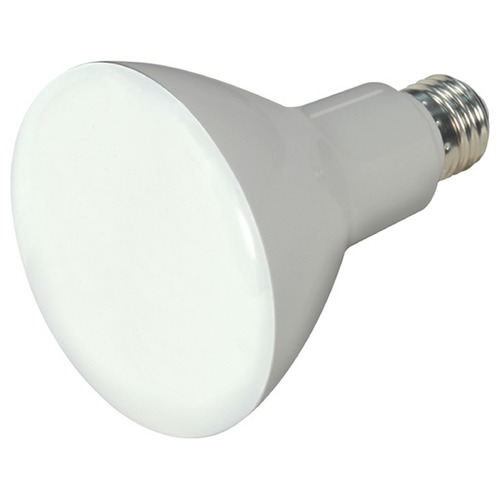 candescent are the most common type of bulb used in recessed lighting, but LED and compact fluorescent (CFL) fixtures are also available. Halogen and incandescent bulbs generate more heat and are less energy efficient than other bulbs.
Both CFLs and LEDs have long service lives, but most CFLs can’t be dimmed, and they contain trace amounts of mercury.
Pro Tip: LED recessed lights are the most efficient bulbs available today and can be dimmed using standard dimmer switches.
Recessed lighting is a beautiful and simplistic way to brighten up your place, the minimalist approach that never goes out of style. By creating a detailed lighting plan for your home, you will be prepared to get that recessed lighting look that everyone will appreciate.