The how to guide for installing track lighting
Anytime you’ve come across a really nice piece of artwork on a wall, the chances are track lighting was involved to highlight it.
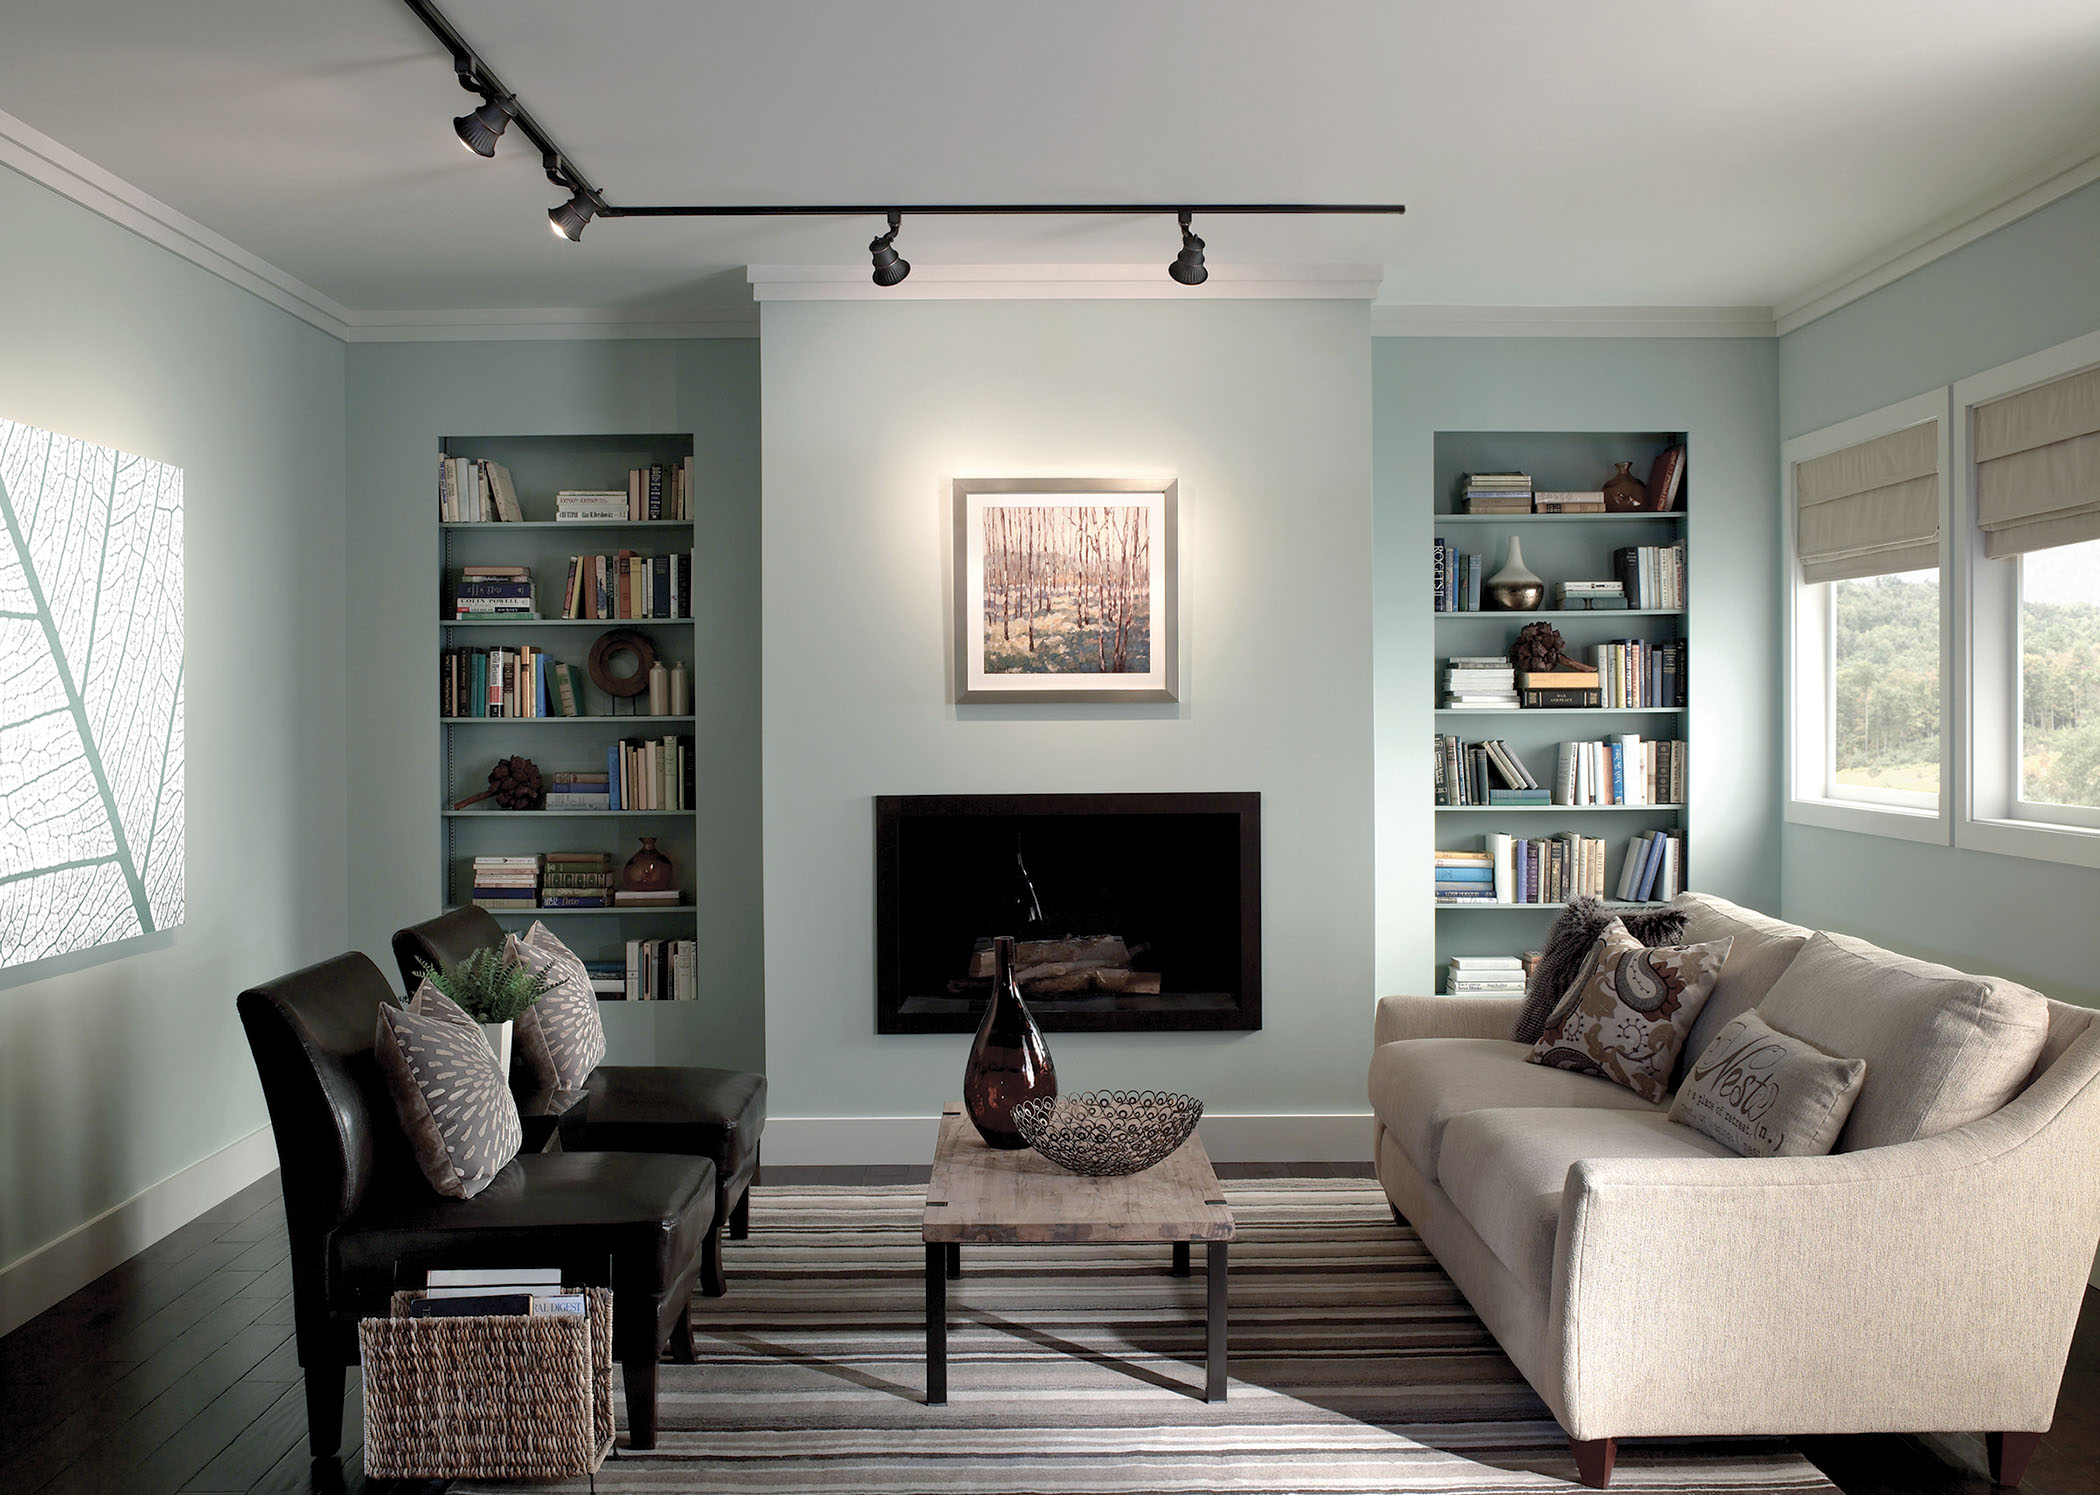
If you’ve fantasized about turning your home into a mini-art museum, or just need some cool lights to show off your decor in interesting ways, track lighting is the way to go. With this handy guide, we can get you started on your way to installing it yourself.
Installation takes only a few hours, and it might be easier than you think. Here is an overview of everything to know before you get started on installing your track lights.
Most important rule first: Safety
Before you do anything:
- Make sure the electricity to the fixture you are working with is turned off at the circuit breaker.
- Turn the light switches are in the OFF position. You can use a voltage meter to verify that there is no power moving through the wires.
Trust us, it’s better to be safe than sorry when it comes to electricity.
Also, it’s important that the wiring and electrical connections are up to date and meet the current building codes in your area. If you are unsure, check with a certified electrician before you get started. If your home does require new wiring for the project, make sure to check with the local authorities to determine whether any permits are required.
Verify Wattage Output
You’ll want to know the wattage output of the existing electrical connections. A typical light fixture with a single lamp can range from 5 to 105 watts, so you’ll need to verify that the electrical connections are rated for the appropriate wattage of the track lighting that you wish to install. Consider any other lights and appliances that are on the same circuit to make sure that the lighting you’re installing will not exceed the electrical capacity of the circuit. If the track lighting will go over the wattage output for the circuit, you’ll need to contact an electrician to add another circuit to accommodate the lighting.
A list of ingredients to get started
Before you get started, here’s all the materials and tools you’ll need to have.
Materials
Track lighting typically requires a few basic components. Rail kits typically include most of the materials and components you’ll need. They often include:
- Wire Nuts
- Electrical Wires
- Tracks
- Light Fixtures
- Bulbs
- Mounting Hardware
You might need to purchase some of these things separately if your rail kit doesn’t have them.
Tools
Tools you’ll need include:
- Voltage Meter
- Tape Measure
- Electrical Tape
- Wire Strippers
- Drill
- Safety Glasses
Planning for the installation
Track lighting comes in two main forms:
- Standard or ‘straight’ tracks. Straight tracks are the most common form, excellent for task lighting and spotlighting,
- Flexible tracks can be formed to suit a sitting area. These have a little more flexibility and options.
Track light placement
To best highlight your artwork or displays, position your lighting approximately 18 to 26 inches away from it to maximize the effect. For task lighting above kitchen counters or other work spaces, locate the track centrally above the area. When choosing the location for the track, make sure it is at least six inches away from drapery or other flammable materials.
Plan your track and mark the path with a pencil, noting the location of the ceiling joists. If you don’t know where the ceiling joists are, a stud finder can help you locate them. Measure to be sure that your track will line up with the joists. Maintain a parallel track by measuring the same distance inward from the wall at each end of the planned path.
Preparing and installing the electrical connections
It’s important to know exactly how the connections will attach.
Document your setup
Before you disconnect any of the wires, take a photo of the existing configuration or label each wire with masking tape so that you can see exactly how the new one will be wired. Typically, you’ll see a bare copper ground wire, a black supply wire and a white neutral wire in the existing house fixture. There may also be a red wire, which would be used with a dimmer switch. If your wiring differs from this, consult a licensed electrician before continuing.
After noting the old connections, you can start installing the new track lighting. Check the instructions on the new lighting to determine whether the wires for the new fixture screw into terminals on the plate or are attached using plastic connectors (wire nuts).
If the wires screw into terminals, you may need pigtails, which are special connectors that are used to join multiple wires to the same location. For either type of connection, use your wire strippers to strip about half an inch of the rubber coating from the end of each wire. This will ensure that there’s a strong connection.
Connecting the Ground Wire
It’s imperative that the ground wire is connected properly. The ground wire provides a safety release by sending excess current into the ground rather than out through the outlet where it can cause damage. The ground also provides a path for the current in the neutral wire if the outlets’ current is interrupted or broken.
- Look for the bare copper and an insulated green wires and connect them with a wire nut. If you don’t see a green wire on the track lighting, there will be a grounding screw inside the junction box instead. This screw will have a green head.
- Wrap your house’s ground wire around the shaft of the screw and tighten the screw until the wire is secure.
- Finish the wiring by connecting white to white and black to black.Your house wiring may include a red wire as well. If you’re installing a dimmer switch, check your manual to see how to connect the red wire. Otherwise, simply cap the red wire with a wire nut.
Installing the Track
- After connecting all the wires, tuck them inside the junction box and secure the mounting plate, making sure to use locking screws if required.
- Use the included T-connectors, angle and straight track connections to create the layout you want to achieve.
- Anchor the track into the ceiling joists, using your drill to make mounting holes. If you must attach a screw directly to drywall or plaster, make sure to use toggle bolts or anchors so that the track screws do not loosen or pull out over time.
- Attach end caps at the end of the run for a clean and professional look.
Track light heads generally attach in one of two ways. Some lock into place with a 90 degree turn. Others use a metal arm to tighten each head into place. The directions included with your lighting will provide guidance on how to install your particular light heads.
After attaching all of the light heads, add the light bulbs to your fixture. Be sure to install light bulbs that are within the guidelines provided by the manufacturer. Failing to use the correct bulbs can result in frequent replacements or even fire if the wattage is too high for the fixture.
Give it a test run
After the bulbs are installed, test your new track lighting. Turn the power back on at the circuit breaker box and flip the switch on the fixture. If the lights don’t work, turn the power back off at the breaker and test the connections. Go through each of the wire connections and make sure all are attached and secured properly. Turn the power back on and your lights should work.
Installing Track Lighting Outside of an Existing Fixture
If you want to install track lighting in a different location than where your box is currently located, you will need to contact a professional electrician to ensure the new wiring and relocation is completed properly.
You can also consider using special track lighting kits and connectors that are designed to run from an existing box to a new location. Using these options results in a small, covered track that runs along the ceiling from the old fixture to the location of the new one. This track covers the wires safely and lets you install the lighting anywhere you like.
Sit back and admire your new track lights…
Have fun adjusting the light heads and exploring different ways to alter your look and ambiance. If any of the light heads seem loose or uneven, make sure to add shims to tighten them up and keep them straight.
Track lighting is the perfect way to add class and sophistication to any interior space. You’ll find that it’s a great way to add targeting lighting that makes everything else look new. Feel free to experiment with different bulbs and lens shapes until you are happy with the brightness and color of your new lighting. If you decide you want a completely new look, you can even substitute different styles of light heads, such as adding mini-pendants with the use of an adapter or alternating sizes of hanging fixtures to create new lighting designs.
Our hope is that this guide can help you navigate the track light installation process with ease.
Happy installing!
*Legal Notice: Destination Lighting content is for information only. It is strongly recommended that you consult a professional before attempting any lighting or wiring projects. The company is not liable for misuse of its content.